Table of Contents
Introduction
Business units in foreknown represent a view of your company and can e.g. represent different locations or areas of competence. On the one hand, employees and managers can be assigned to a division, and on the other hand, orders. In this way, a business unit receives both the information about which services and costs were generated from the orders, as well as the staff costs that can be determined by the assigned employees.
With the help of this information, divisional controlling is then set up, where important key figures relating to costs, revenues and the resulting contribution margins can be easily queried by the responsible managers.
Search Business Unit
In the upper area of the "Business Unit" dialog you will find the search field and the "+ New" button (see also Create Business Unit). Below this area all already created business units are displayed in the form of a scrollable, sortable and filterable list.
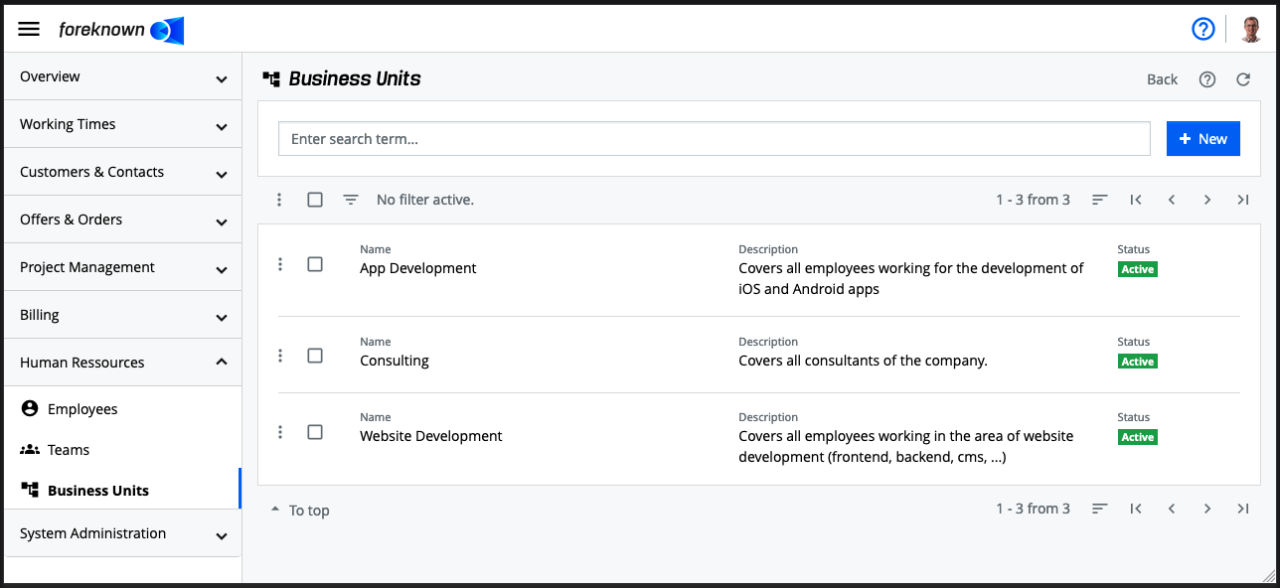
By entering a search term, the list shows only those business units that contain the entered search term in their name. In this way, individual business units can be found and edited quickly.
Filter Business Units
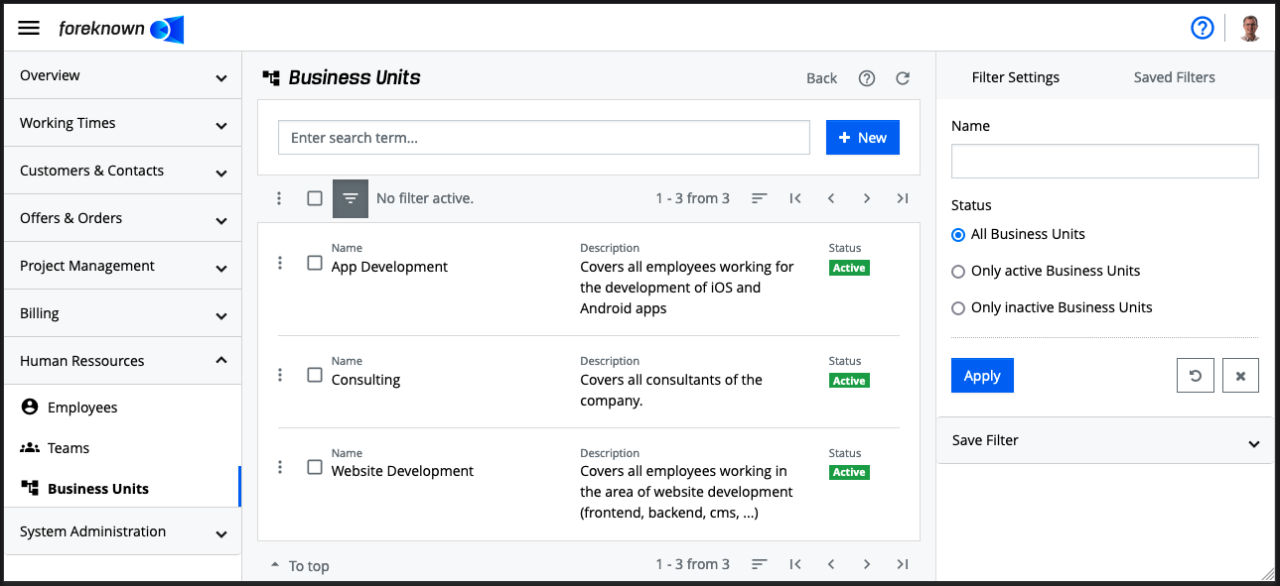
The business units management offers the following filter settings:
- Name: Only business units that contain the entered value in the name are displayed.
- Status: Only the business units that have the selected status are displayed.
The "Apply" action will display all business units in the list that match the filter criteria. The "X" action removes all filter settings and the list shows all business units again. The "Reset" action (icon: arrow in a circle) cancels all changes made to a saved filter. are discarded.
For general information on the filter options, see also the chapter Basics: Filter.
Create Business Unit
To create a new business unit, click the "+ New" button located at the top right of the search field. This button opens the popup dialog "Create Business Unit".
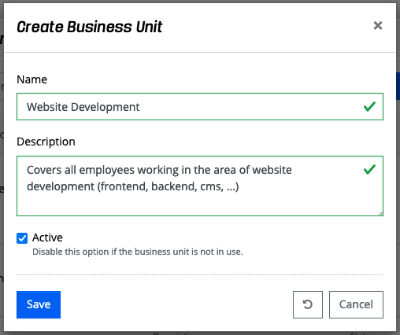
The following properties must/could be specified for a new business unit:
- Name: A unique name for the business unit should be selected here.
- Description: A more detailed description for the business unit can be entered here.
With the action "Save" a new business unit is created. With the action "Reset" and "Cancel" the entries are discarded and in case of the action "Cancel" the dialog is closed.
Edit Business Unit
A business unit can be edited either via the action menu and then "Edit business unit" or in the detail view with the pencil icon in the top right corner. The "Update business unit" dialog opens.
Here the properties from the [Create Business Unit]#create) dialog are displayed for editing.
The "Save" action saves the changes made to the business unit. With the action "Reset" and "Cancel" the entries are discarded and in case of the action "Cancel" the dialog is closed.
If a business unit is to be deleted again, this can be done via the action menu and then "Delete business unit". A pop-up dialog opens, which must be confirmed with "Delete".
Employees
The "Employees" tab is located below the base data. Here you can define who should be assigned to the business unit with the role of an employee. Initially, all active and inactive employees are displayed in the list.
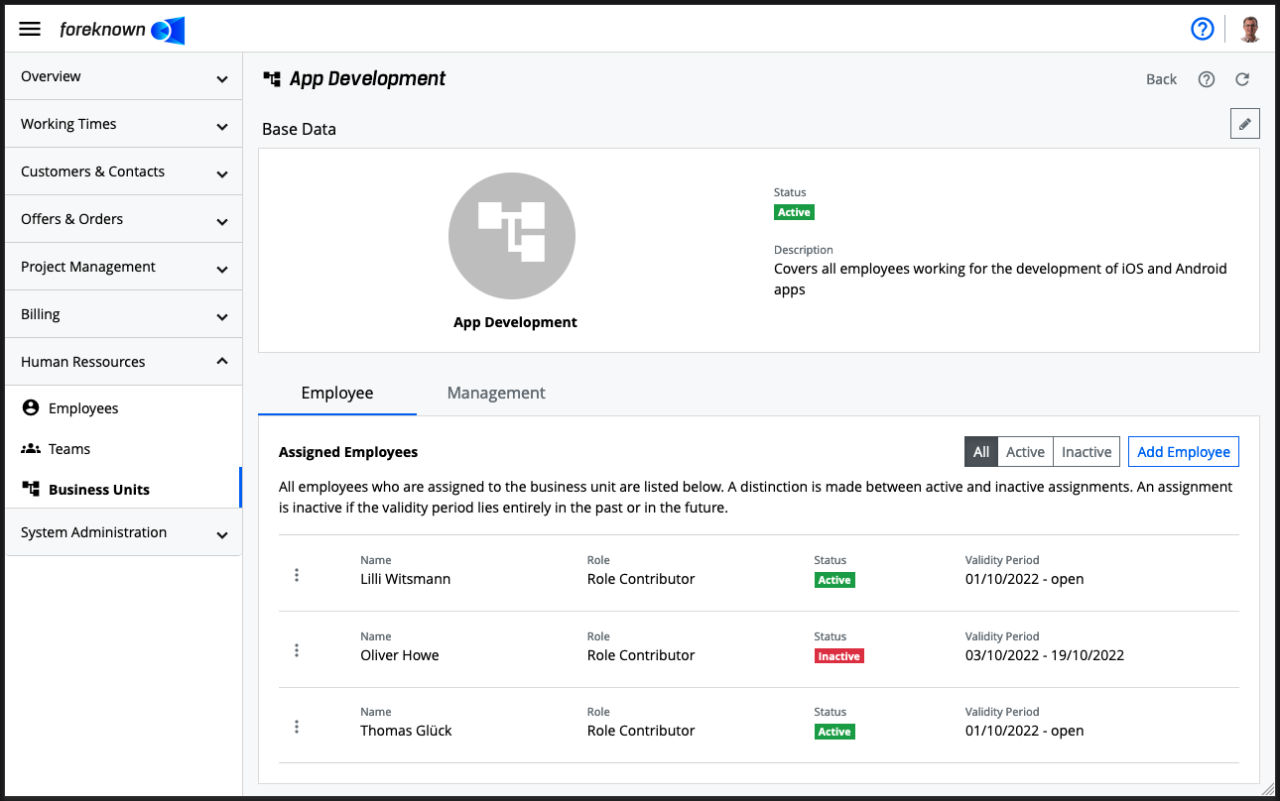
The buttons "All", "Active" and "Inactive" above the list can be used to decide whether all (initial), only active or only inactive (validity period in the past or future) employees should be displayed.
Add Employee
To add an employee, click on the "Add Employee" button in the upper right corner. The dialog of the same name will open.
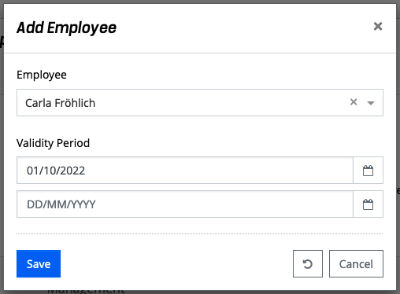
The following properties can/must be specified for an employee:
- Employee: Here an employee(s) must be selected from an Auto-Fill field.
- Valid period: A start date and an end date must be specified here. If no end date is specified, the assignment is valid indefinitely.
The "Save" action is used to add the employee. With the action "Reset" and "Cancel" the entries are discarded and in case of the "Cancel" action the dialog is closed.
Edit Employee
To edit an employee, click on "Edit" in the action menu. Thereupon the "Edit employee" dialog opens, in which the start and end date can be changed.
With the action "Save" the changes will be applied. With the action "Reset" and "Cancel" the entries are discarded and in case of the action "Cancel" the dialog is closed.
NOTE: Changing an employee from a business unit has an effect on the business unit controlling.
Remove Employee
If an employee is to be removed from the business unit, "Remove" must be clicked via the action menu. The "Remove employee" dialog opens. If you confirm with "Remove", the employee will be removed from the business unit.
NOTE: The removal of an employee from a business unit will have an impact on business unit controlling.
Manage Cost Transfers
An employee is always assigned to exactly one business unit at the same time. Therefore all costs of the employee run against this business unit. However, if an employee also works partially for another business unit, this one should also be allocated a share of the employee's costs.

For this purpose, the action "Create Cost Transfer" was created for an employee assignment, so that one or more cost transfers by other business units can be defined for each employee of a business unit. This action opens the following dialog:
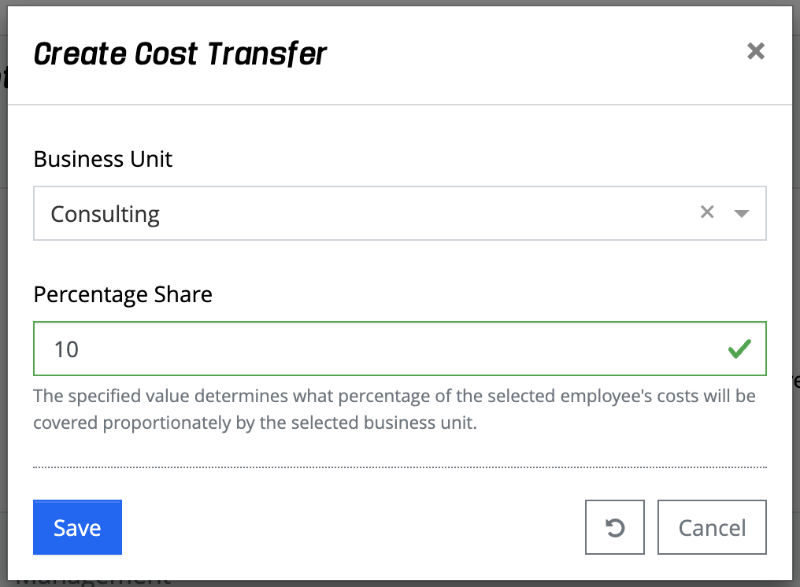
The following information must be provided for a cost transfer:
- Business Unit: The business unit that partially covers the costs for the employee is selected from a list.
- Percentage Share: The specified value determines the percentage of the selected employee's costs that will be covered by the selected business unit. The value must be at least 1 and at most 100. If other business units have already been assigned for cost transfers, the percentage value in sum must not be more than 100%.
With the action "Save" a new cost transfer is created and you return to the detail view of the business unit.
Management
The "Management" tab is located below the master data. Here you can define who should be assigned to the business unit with the role of a manager. Initially, all active and inactive managers are displayed in the list.
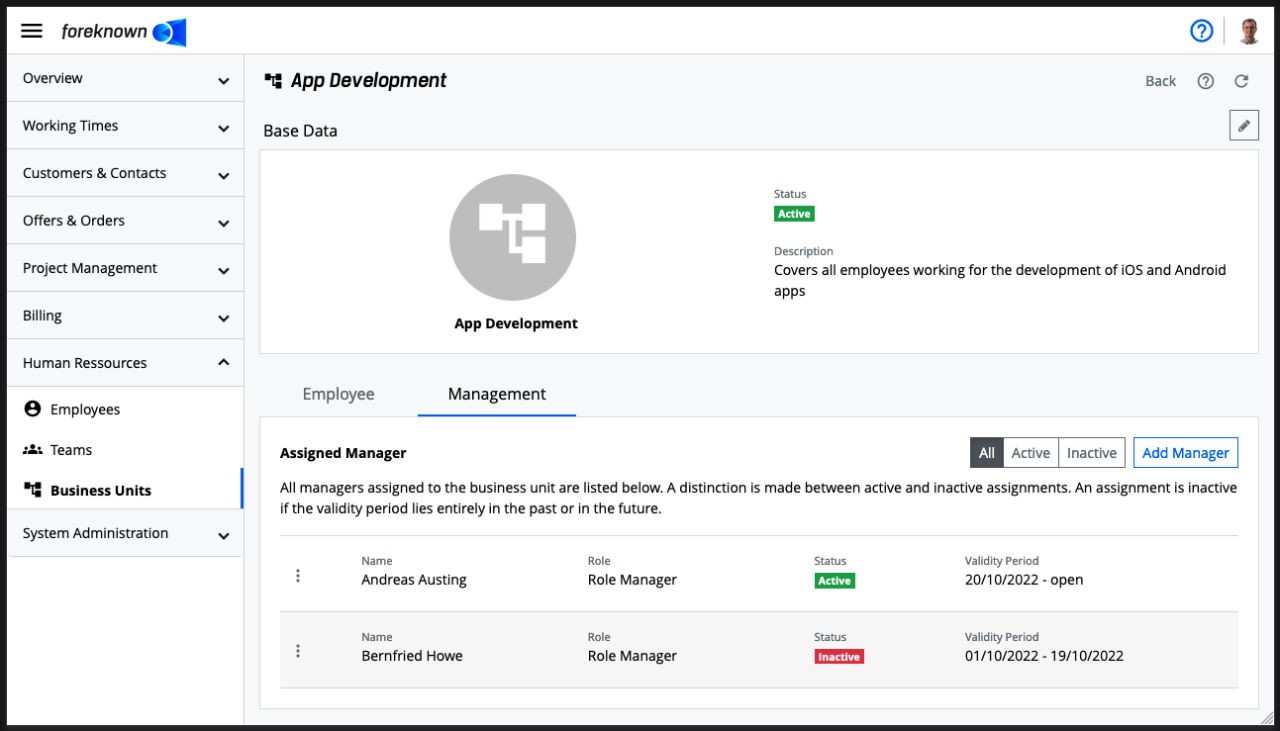
The buttons "All", "Active" and "Inactive" above the list can be used to decide whether all (initial), only active or only inactive (validity period in the past or future) managers should be displayed.
Add Manager
To add a manager, click on the "Add manager" button in the upper right corner. The dialog of the same name will open.
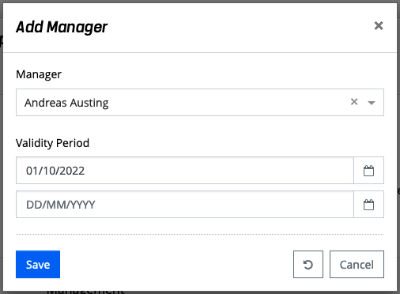
The following properties can/must be specified for a manager:
- Manager: Here a manager(s) must be selected from an auto-fill field.
- Valid period: A start date and an end date must be specified here. If no end date is specified, the assignment is valid indefinitely.
The "Save" action is used to add the manager. With the action "Reset" and "Cancel" the entries are discarded and in case of the "Cancel" action the dialog is closed.
Edit Manager
To edit a manager, click on "Edit" in the action menu. Thereupon the "Edit manager" dialog opens, in which the start and end date can be changed.
With the action "Save" the changes will be applied. With the action "Reset" and "Cancel" the entries are discarded and in case of the action "Cancel" the dialog is closed.
NOTE: Changing a manager from a business unit has no effect on business unit ontrolling, only on the manager's authorization.
Remove Manager
"Remove" must be clicked via the action menu to open the confirmation dialog. If you confirm, the manager is removed from the business unit.
NOTE: Removing a manager from a business unit has no effect on business unit ontrolling, only on the manager's authorization.
