Table of Contents
Introduction
In foreknown's contact management, all contact persons with whom a customer relationship exists are maintained. In this way, contact data of persons required in the context of an offer negotiation, an order placement or the execution of an order or project can be stored and used as needed.
Contacts can be assigned to a customer, offers and orders to mark them as contact persons. Each contact can be assigned a postal address and contact details such as telephone numbers and an e-mail address.
The contact management is accessible via the menu item "Companies & Contacts / Contacts" for users with the role "Account Manager".
Search Contact
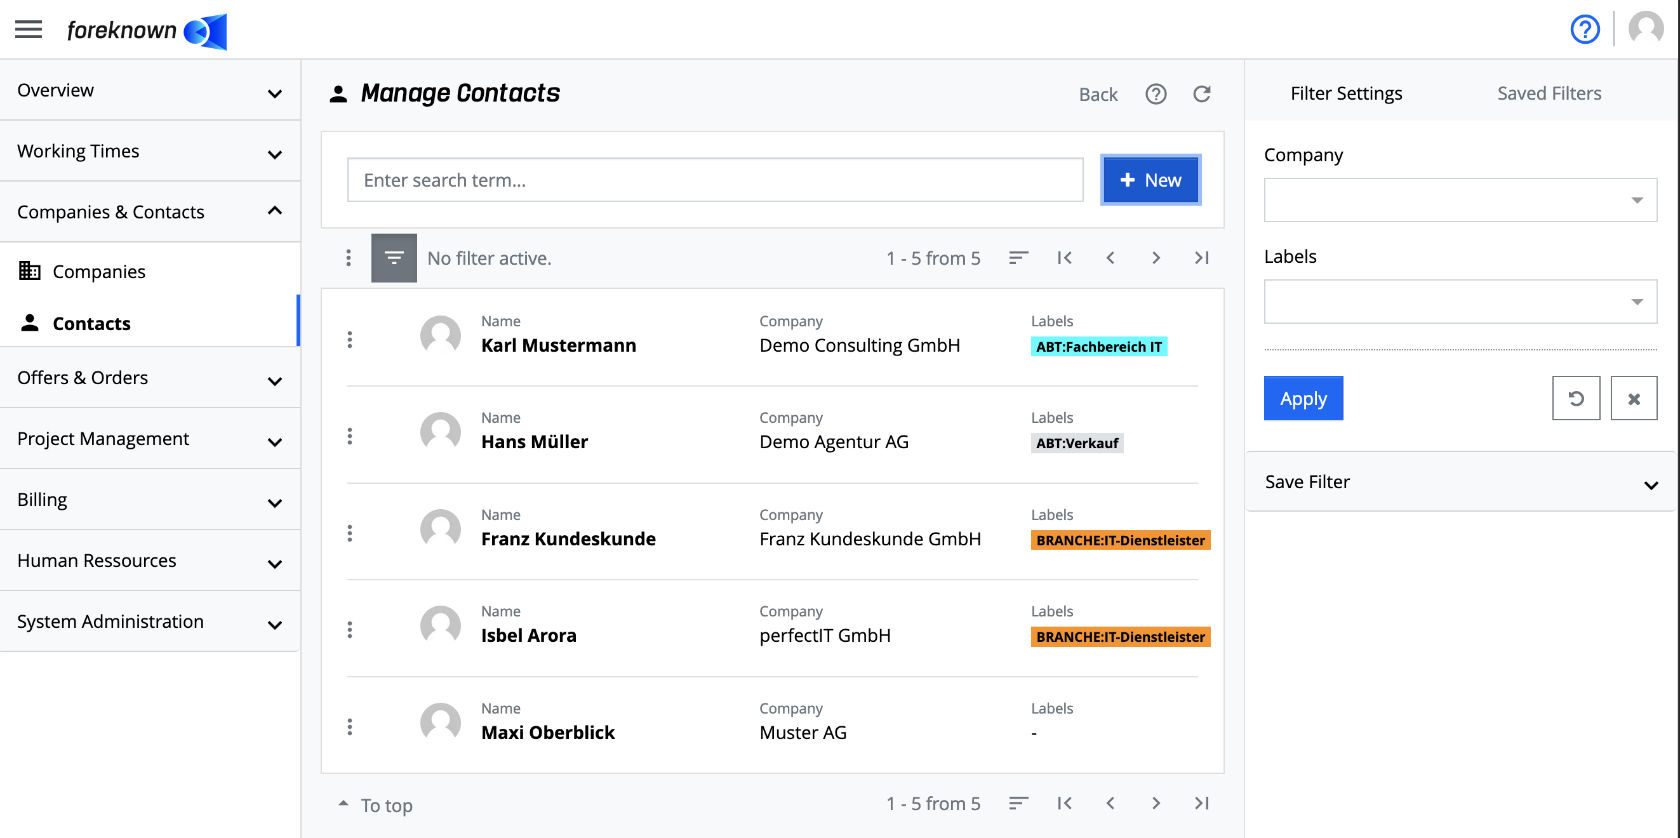
The upper area of the dialog contains the search field and the "+ New" button (see also Create Contact). Below this area all already created contacts are displayed in form of a scrollable, filterable and sortable list.
If you now enter a search term in the input field, the list will only show those contacts that contain the entered search term in their name. In this way, individual contacts can be found and edited quickly.
Filter Contact
In addition to the search function, the contact management also offers a filter dialog. In foreknown, a filter dialog is always located as a fold-out dialog on the right side. The filter dialog can be expanded and collapsed by clicking the button on the left above the list with the three dashes above it.
The contact management offers the following filter settings:
- Company: A company can be selected, so that only contact persons are displayed who have been assigned to this company.
- Labels: One or more labels can be selected. All contacts that have been assigned one of the selected labels will be displayed.
The "Apply" action will display all contacts in the list that match the filter criteria. The "x" action removes all filter settings and the list shows all contacts again. The "Reset" action (icon: arrow in a circle) discards all changes that may have been made to a saved filter.
For general information on the filter options, see also the chapter Basics: Filters.
Create Contact
To create a new contact, click on the "+ New" button located at the top right of the search box. This button opens the popup dialog "Create Contact".
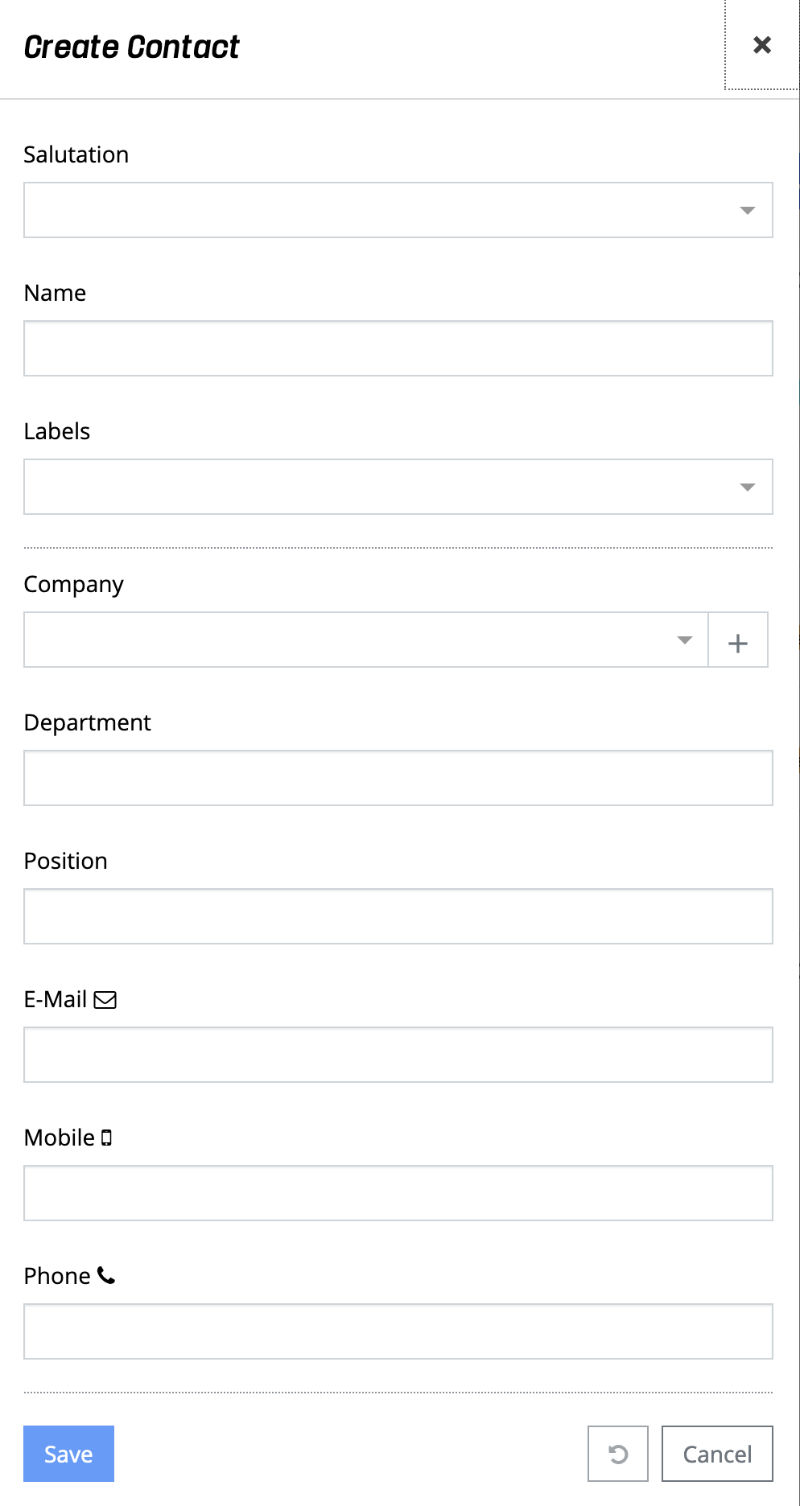
The following properties must be specified for a new contact:
- Salutation: Select the salutation, which fits to the customer's name. The salutation can be used in invoice templates.
- Name: The first and last name of the contact is specified here.
- Labels: Labels can be assigned to a contact from a drop-down list. If the desired label does not yet exist, it can be created directly with the assignment. Labels give a contact additional properties for a classification, e.g. role in the company.
- Company: An existing company, where the contact belongs to, can be selected from a drop-down list.
- Department: Optional specification of a department.
- Position: Optional specification of a position.
- E-Mail: Optional specification of an e-mail address.
- Mobile: Optional specification of a mobile phone no.
- Phone: Optional specification of a phone no.
With the action "Save" a new contact is created. With the action "Reset" and "Cancel" the entries are discarded and in case of the action "Cancel" the dialog is closed.
Edit Contact
There are two options to edit the master data of a contact. Firstly, the action "Edit Contact" can be called up in the list of customers via the action menu. On the other hand, an entry in the list can be clicked and the detailed view of a contact opens, where the action with the pencil symbol can also be used to edit the master data.
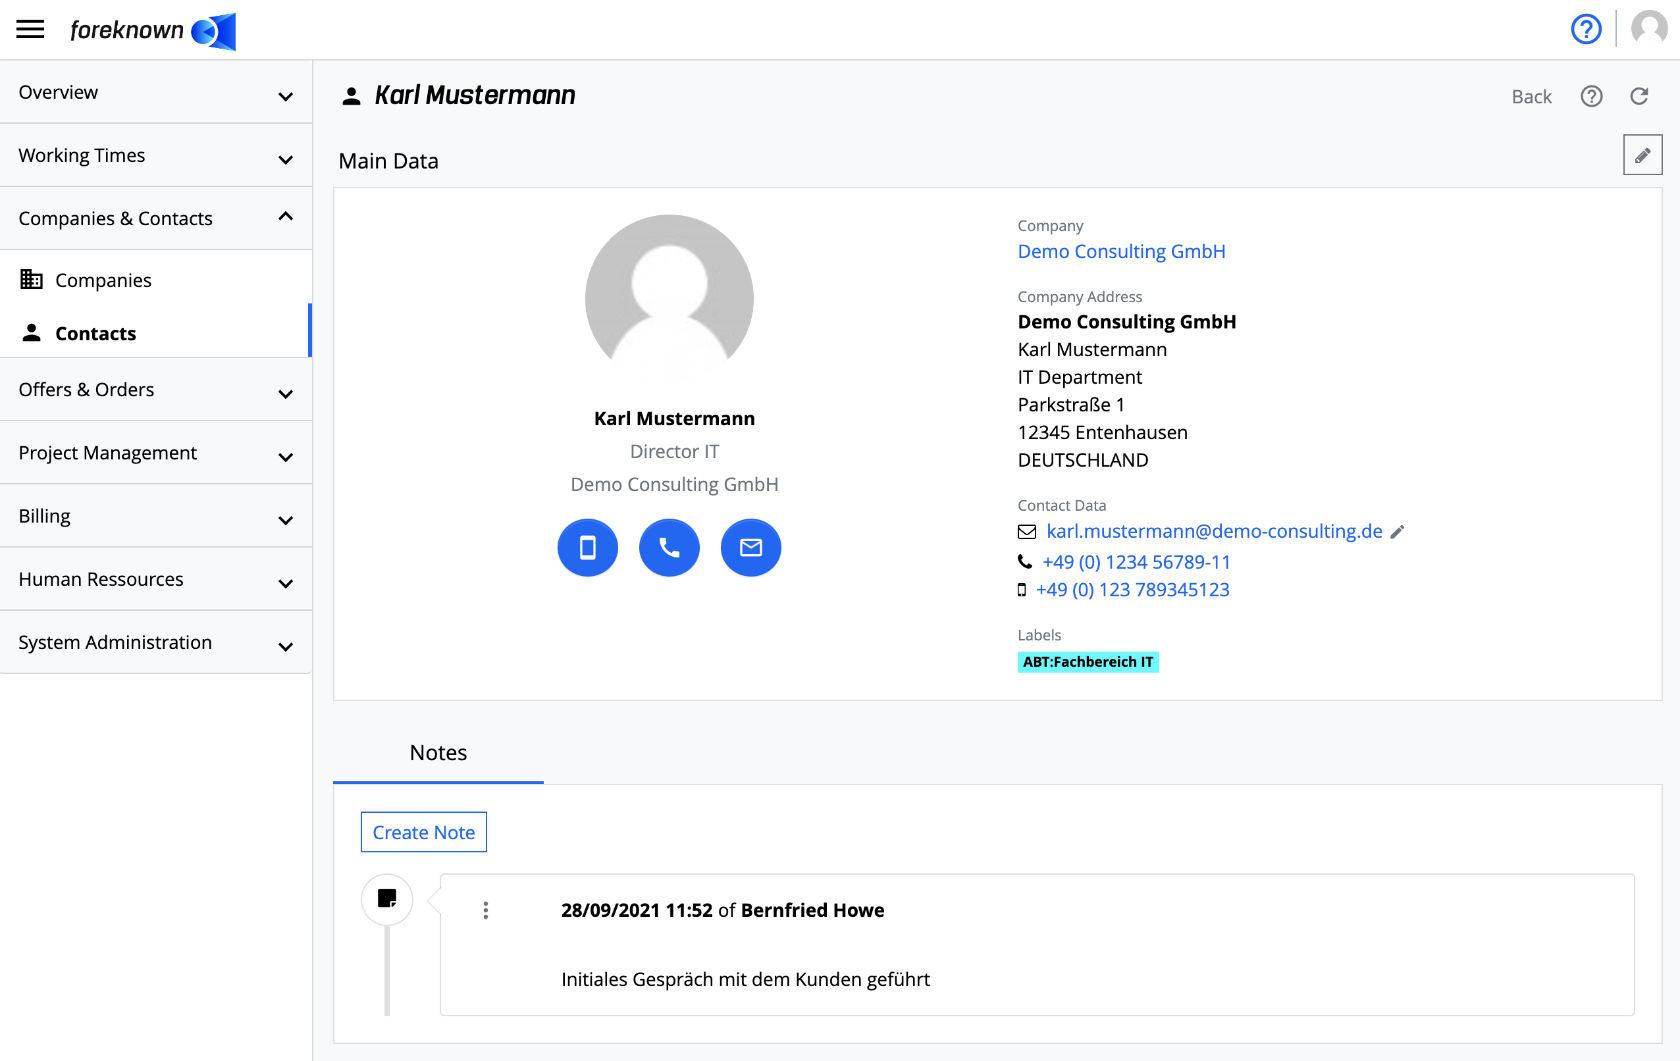
In both cases described above a popup dialog "Update Contact" opens where all master data can be maintained. For further descriptions of this dialog see Create Contact.
Select the "Archive existing contact data?" checkbox if you want to archive the current contact data before saving it.
Note: Access to an archived version of the contact is currently not implemented in foreknown.
The "Save" action saves the changes made to the contact. With the action "Reset" and "Cancel" the entries are discarded and in case of the action "Cancel" the dialog is closed.
Via the action menu, which is offered in each line per contact, a contact can be finally deleted with the action "Delete Contact". A confirmation dialog opens, which must be confirmed with the action "Delete".
Create Notes
Notes can be made on a contact, e.g. from communication via phone or e-mail, to document important information chronologically. Since notes are used in many areas of foreknown, you can find a detailed description of this functionality at Getting Started / Basics / Notes